The pages-and-layouts engine in Omnia Intranet by Precio Fishbone gives you a lot of publishing power. The two most common uses for Pages are News Articles and Content Pages — but you can design a page layout to serve just about any purpose.
One of the most popular requests we get with intranets is a way for employees to praise each other, for team-building and morale purposes. Yammer has a good example of this kind of feature, but what if you want it directly in your intranet? Here are the end-to-end steps, with screenshots (in my fictitious company Blue Rook), to implement a praise/kudos app of your own, in Omnia, without any scripting or coding.
Overview of steps:
- Add custom data properties to your property store
- Create a Page Collection to store all your praise Pages
- Create a Page Type (layout) with your new data properties
- Add a tab to the Notification Panel, to surface kudos to people’s feeds
Step 1: custom data properties.
Before we add custom data props to Omnia, I’m going to very quickly create a SharePoint managed metadata Termset to serve as a picklist for “Praise Type.” We want users to choose from a set list, and a Termset is the perfect place to store this.
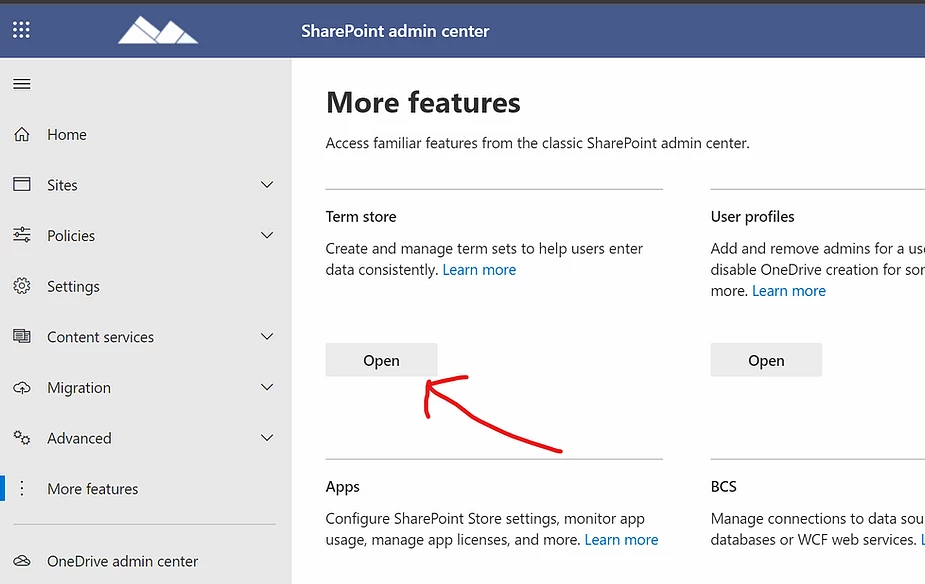
Go to your SharePoint Admin and choose More Features > Term store. Add a set with the different types of kudo that praisers will choose from:
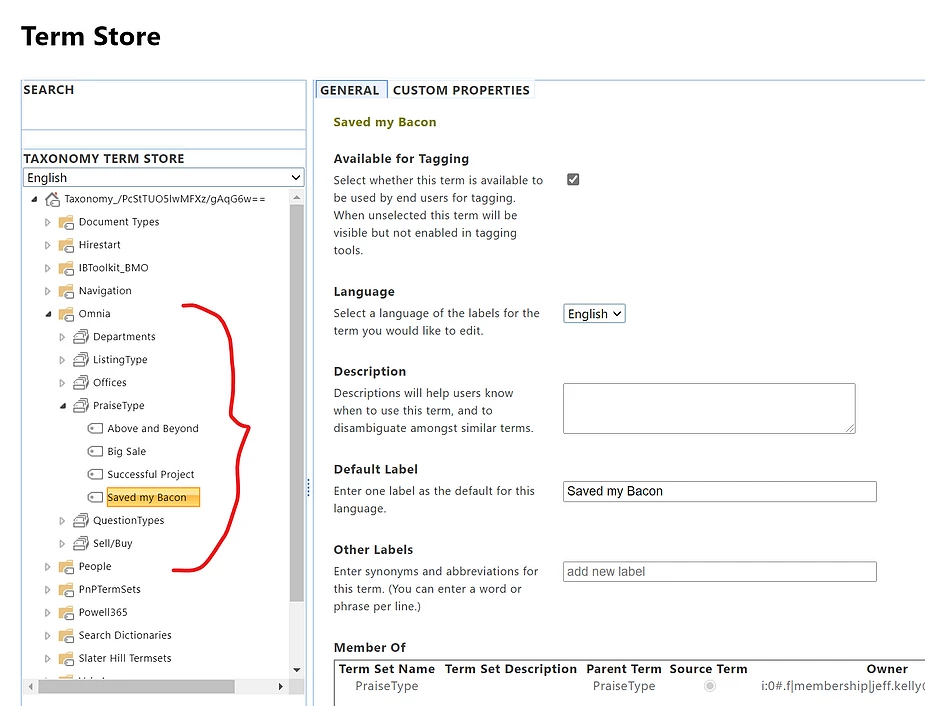
Here I’ve created a termset called “PraiseType” and added the terms “Above and Beyond,” “Big Sale,” “Successful Project” and “Saved my Bacon.”
Now, to the Omnia properties. We create custom properties in the Omnia Admin app; to get there, browse to your intranet at https://<tenantname>.omniacloud.net and click the Omnia Admin link in the right-hand menu. You can also get to Omnia Admin at any time by pressing Shift+o+a on the keyboard.
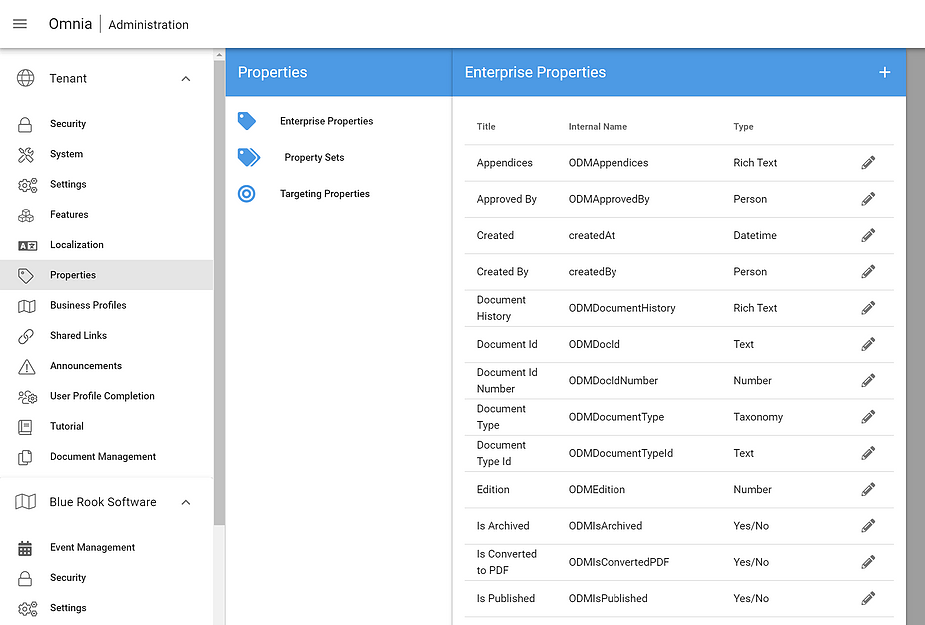
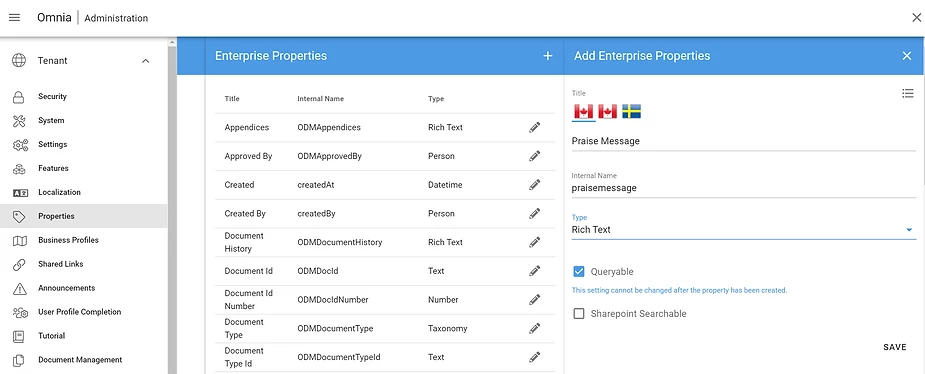
In Omnia Admin, select Properties from the Tenant menu, and then open up Enterprise Properties. Click the white plus button to create a new property.
For my simple Praise App, I’m using the following properties. I’ll only show screenshots of the ones with an asterisk; you get the idea.
- *Praise Type (taxonomy)
- Praisee (person)
- Praise Date (datetime)
- *Praise Message (rich text)
- Will reuse Title from defaults
- Will reuse Page Image from defaults
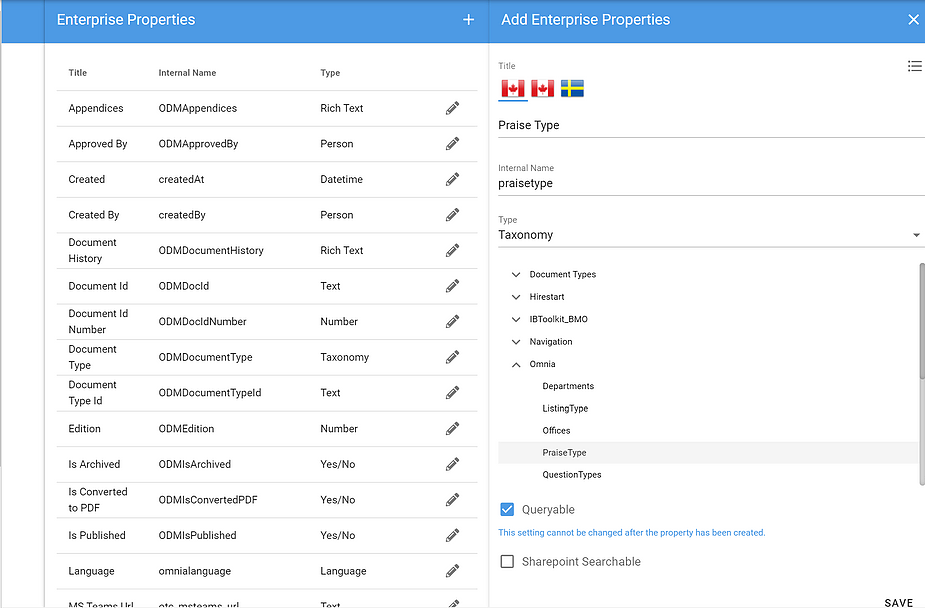
When I choose “Taxonomy” as the data type for my property, Omnia shows me the tree of all my managed metadata Terms from SharePoint to choose from.
If I choose “SharePoint searchable,” I’ll have the option to map my property to a Managed Search Property in SharePoint (we’ll skip this for this example).
Step 2: Create a Page Collection
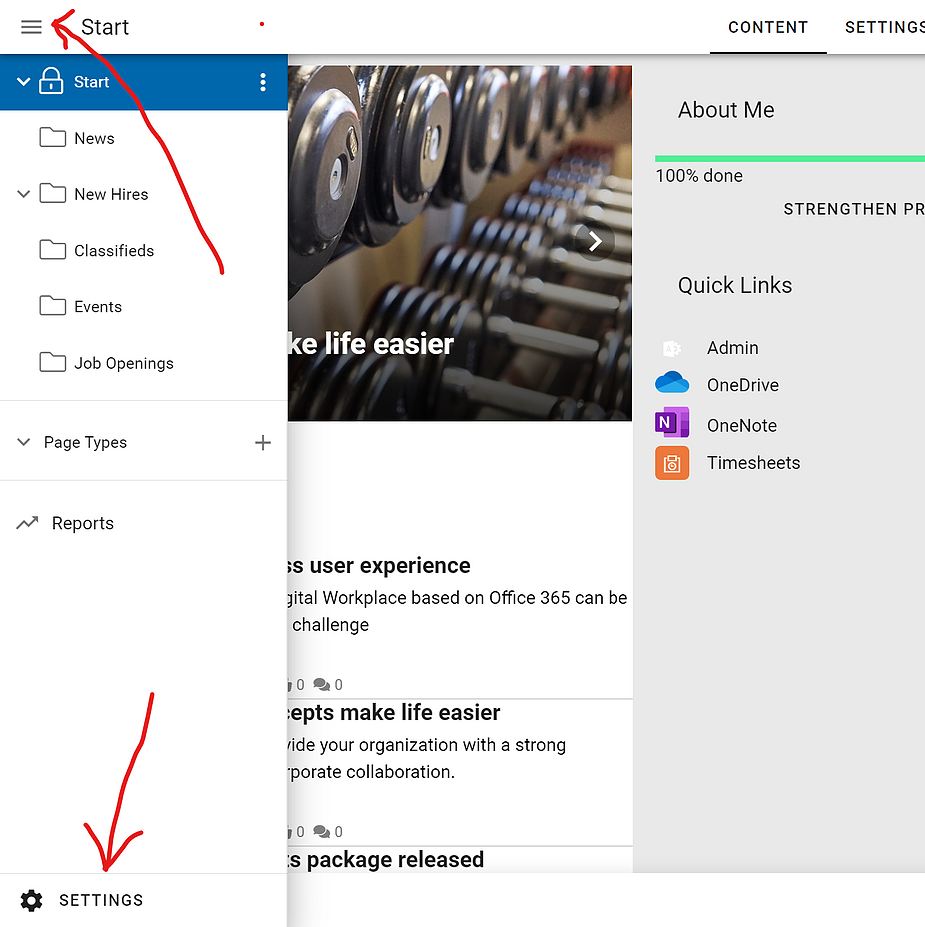
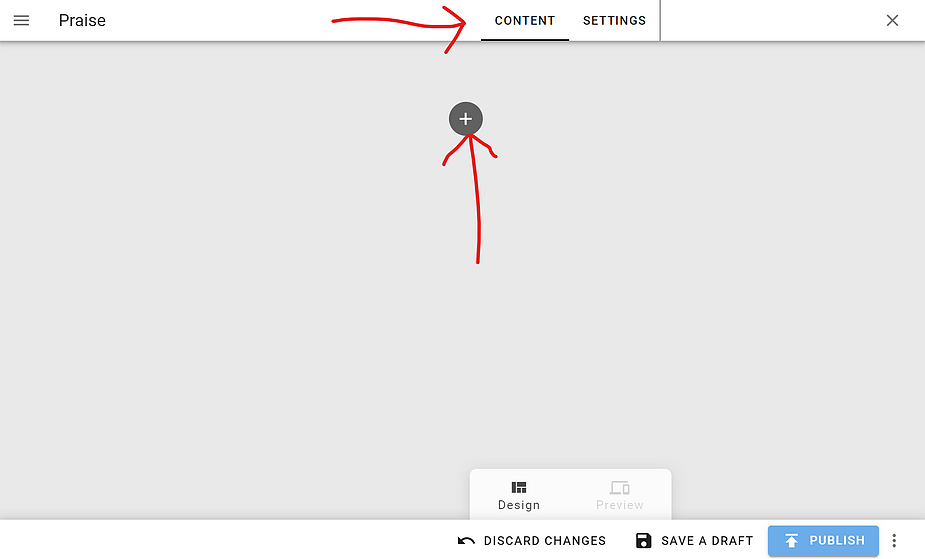
After I configure and save all my new properties, I close Omnia Admin and go back to my intranet site. To collect all my kudos in one place, I’ll create a Page Collection by opening the Omnia Editor (round button at bottom right).
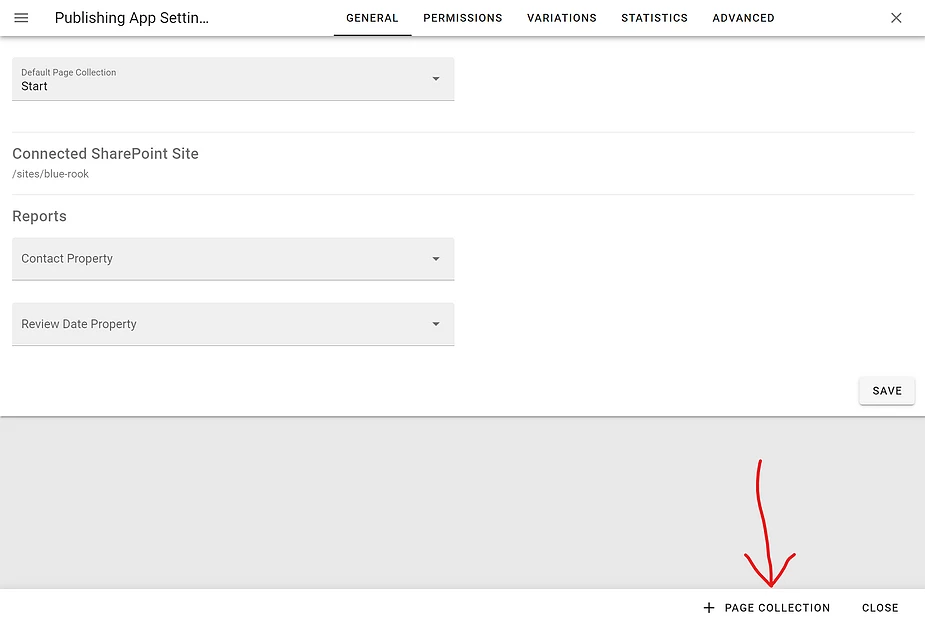
The Editor chrome slides in at the top, left and bottom of my view (if the Page Collections bar is collapsed, I open it with the hamburger button). I then open Settings:
At the bottom right of the screen I can now add a Page Collection (roughly equivalent to a Pages Library in SharePoint):
Step 3: Create the Praise Page Type (layout)
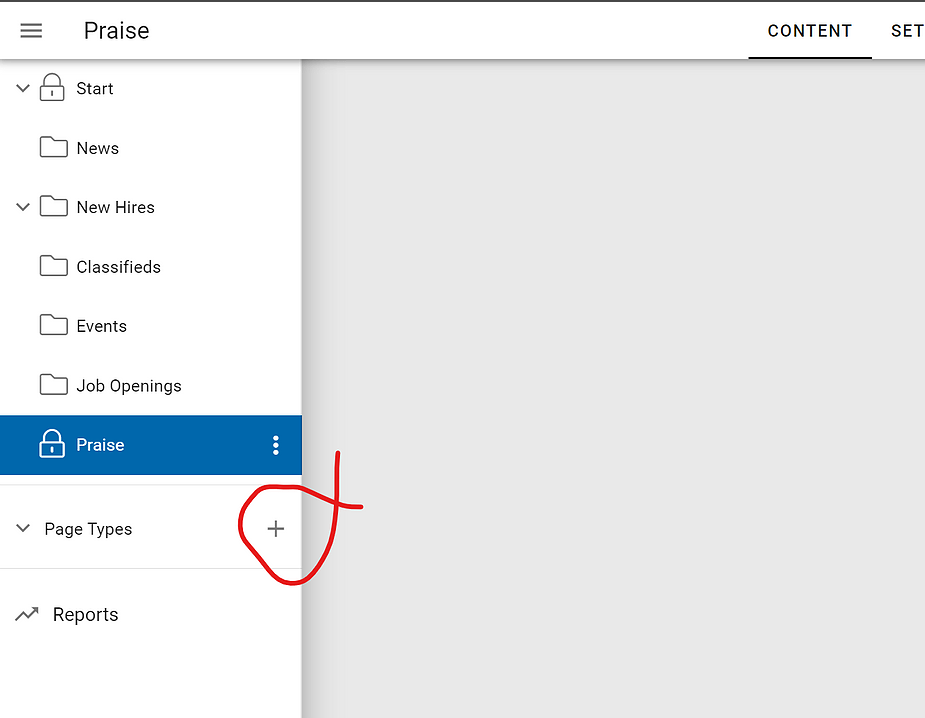
I have created my new Page Collection and named it “Praise.” It now appears in my Page Collections list, but before I do anything else with it, I’ll create the Page Type (layout) that will serve as the template for all employee kudo submissions. Next to Page Types, click the plus sign:
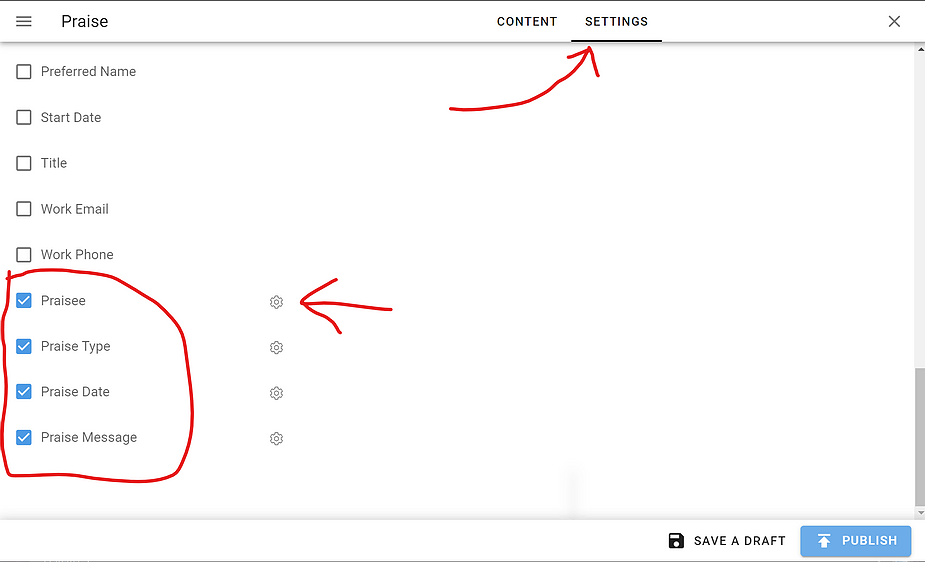
Name your Page Type “Praise” as well, and then switch to the “Settings” tab and scroll down the list of available properties to find the new ones you created earlier. Check off each one, and then click the settings gear to set additional properties per … er, property:
There are advanced options for each data property, most of which are self explanatory:
With the metadata configured, we now flip to the “Content” tab to lay out the page the way we want it. Submitters who create praise pages will have to conform to the layout as we’ve designed it here. The first thing to do is click the plus sign to add a page section:
I’m choosing a 3-column section:

Within my new 3-column page section there are plus-sign buttons to add blocks (called web parts in SharePoint, widgets in other platforms). Here I’m adding a media block in the left column so the page authors can include an image (of the person being praised, or some other picture or video):
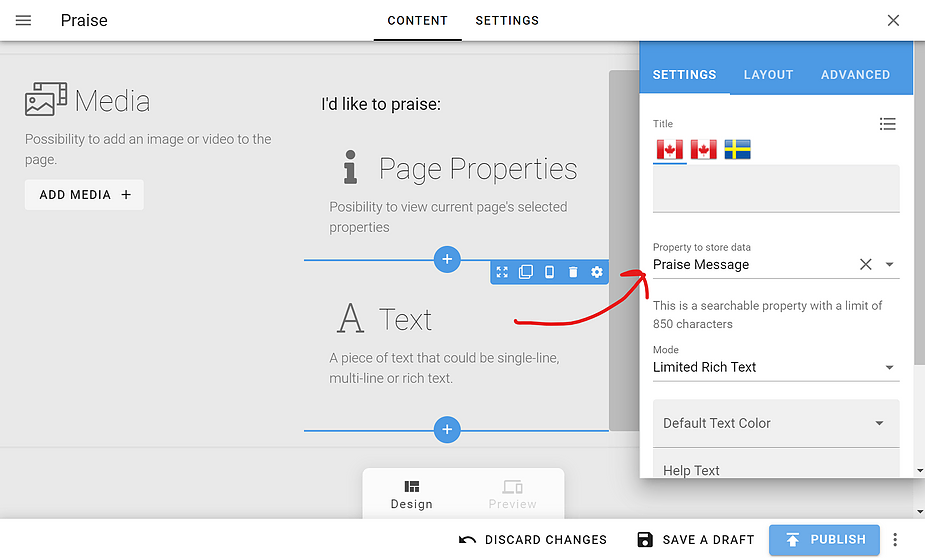
When the author uses my Media control, I want the image selected to go into a metadata field for the page (so I can display it later in rollups, etc.). So in the settings for the block, I use the “Property to store image” picker:

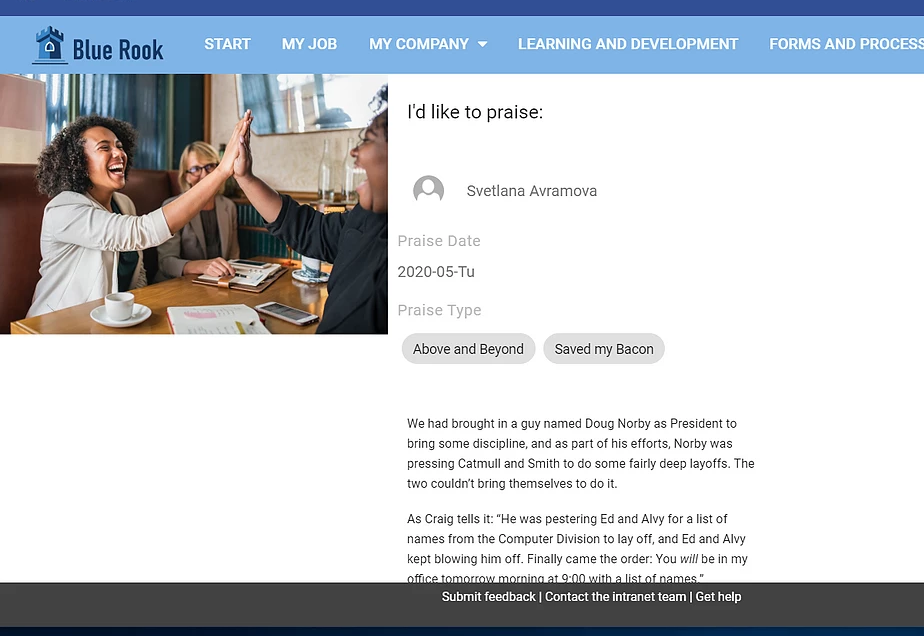
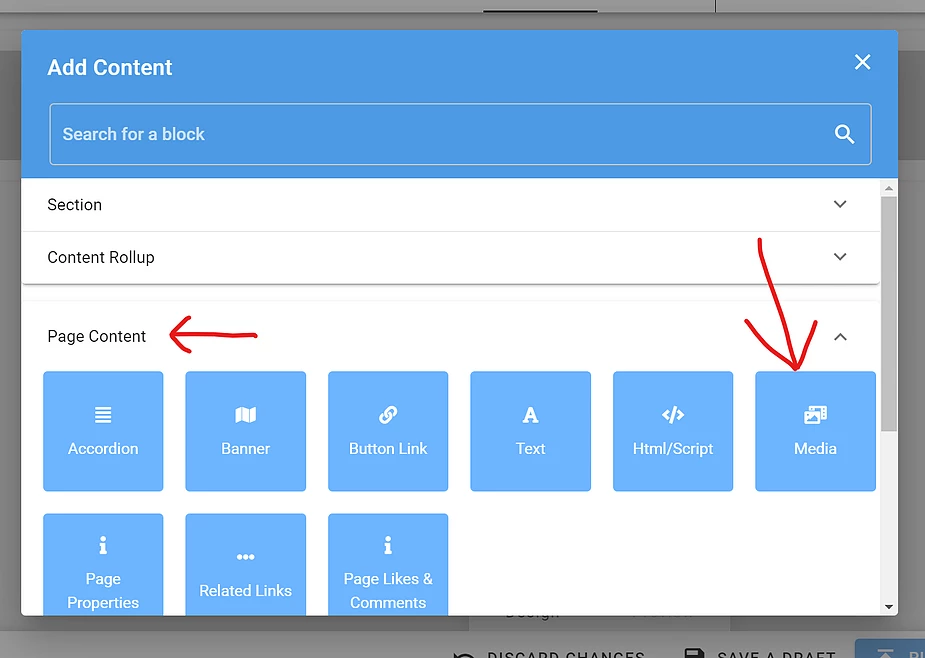
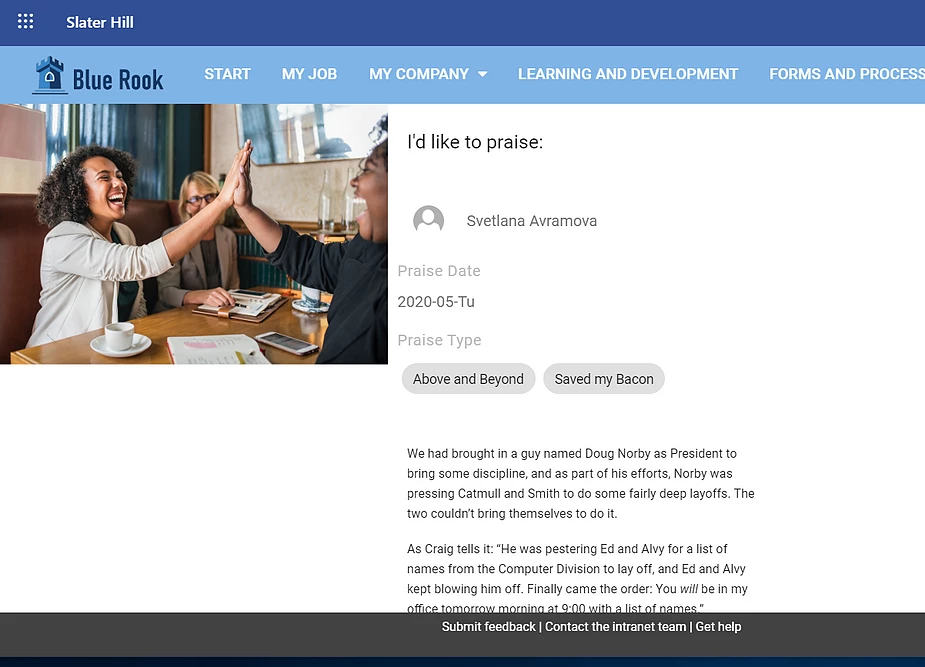
Now I need to give the page authors a place to specify whom they’re praising and why. In the page’s centre column I click the add button and choose some Page Content blocks (starting with Page Properties):
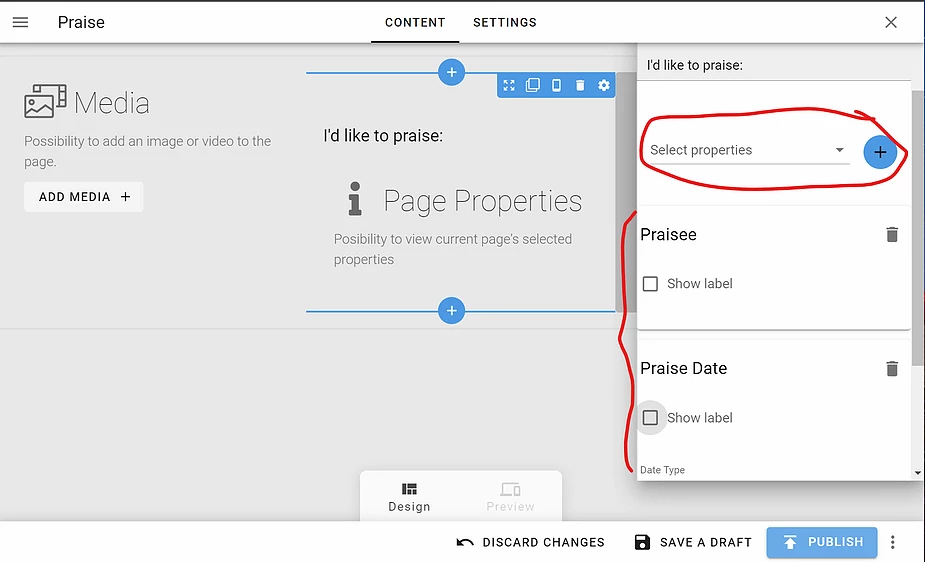
I use the side pane to specify which page properties to display in this block, in which order. I also set other options (including the block’s display title, which I’ve specified as “I’d like to praise:”). I’ve decided to render three of my page props in this one block: the Praisee (person being praised), the date, and the Praise Type (which the author selects from my picklist):
To finish off my Page Type, I’ll add two more blocks: the main Body of the praise, and a the Likes and Comments web part (not pictured).
After saving and publishing my Page Type (we’ll see the finished product below), I now need to attach it to the Page Collection where all kudos will be stored, which I created earlier. I select my Page Collection in the left bar of the Editor, flip to the Settings tab, and check off “Praise” as the only available Page Type for this location. I also set a helpful label for the title of the dialog box whenever someone creates a new page:
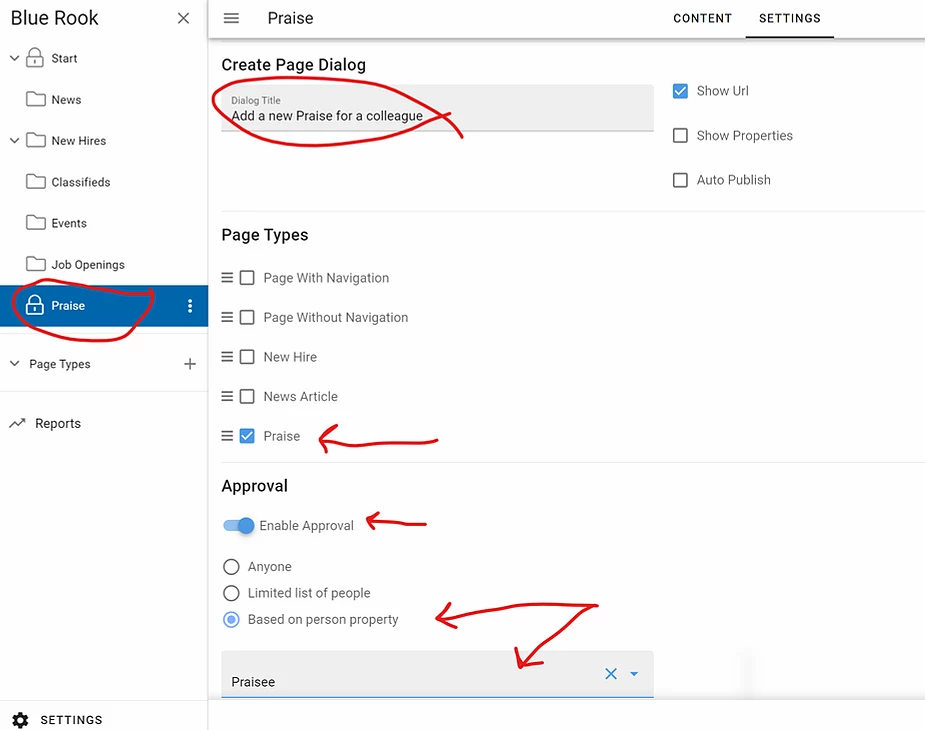
You’ll notice above that I also turned on Page Approval. Normally we specify a “Limited list of people” here, and provide the names of our intranet editors/managers. But, just for fun, let’s use “Based on person property” and specify the person being praised in the kudo. This way, the praisee decides whether the page should go public (in case she’s very modest … ?).
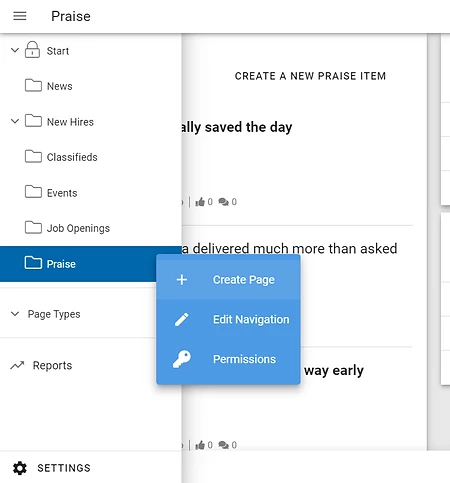
There are a couple of ways for users to create a new Praise page; the quickest way is for the submitter to turn on the Editor, hover over the Page Collection and choose “Create Page.” The authoring experience looks like this:
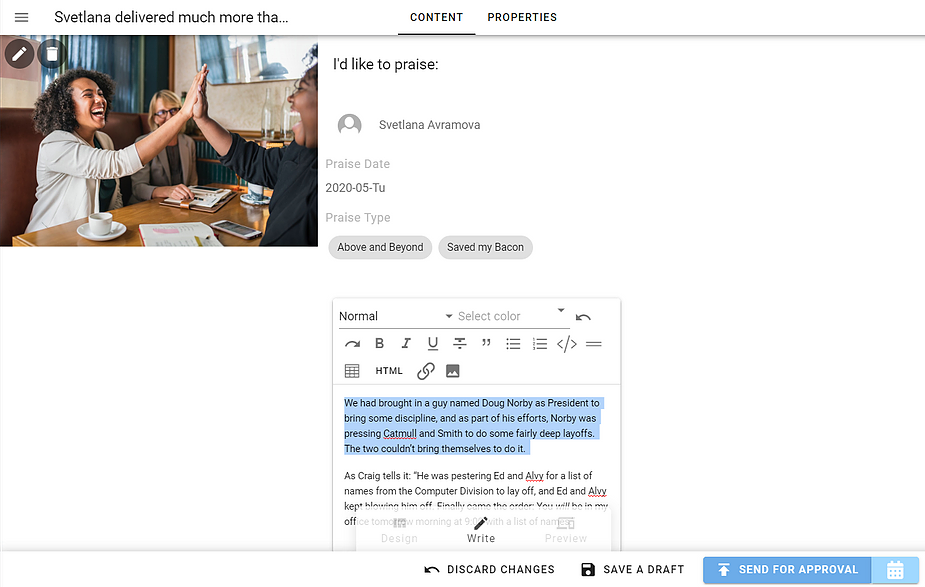
In the new Page dialog, the submitter provides the basic details, and then proceeds to the new Page:

Now the submitter enters images or text into the placeholder blocks we set up in the Page Type.
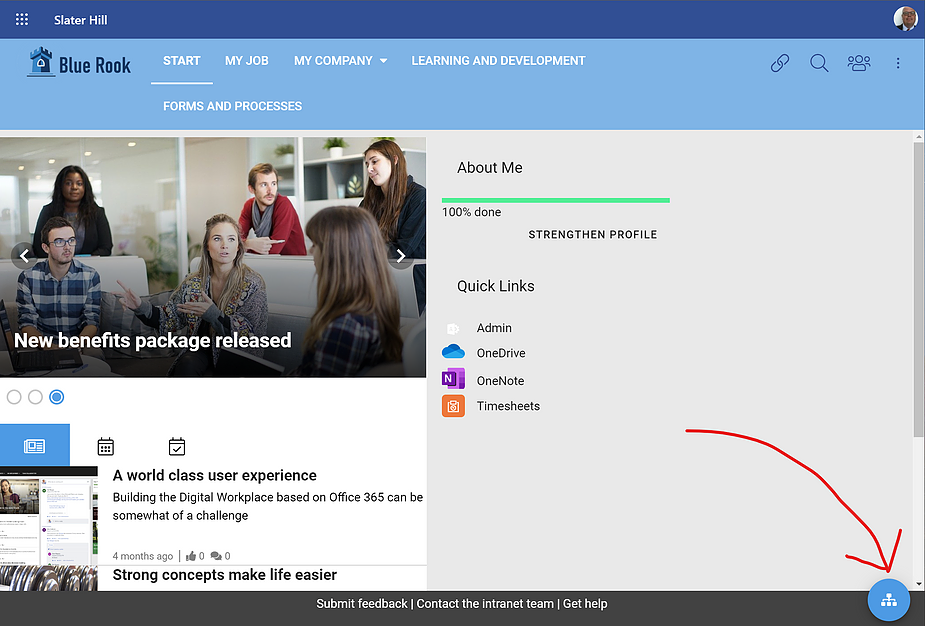
We’re now pretty much finished — but our Praise app is rather buried in the site. We should publicize it and make it useful by surfacing it to the root of our intranet. The best place I can think of to do this is Omnia’s killer app: the Notification Panel.
Step 4: Add a tab to the Notification Panel, to surface kudos to people’s feeds
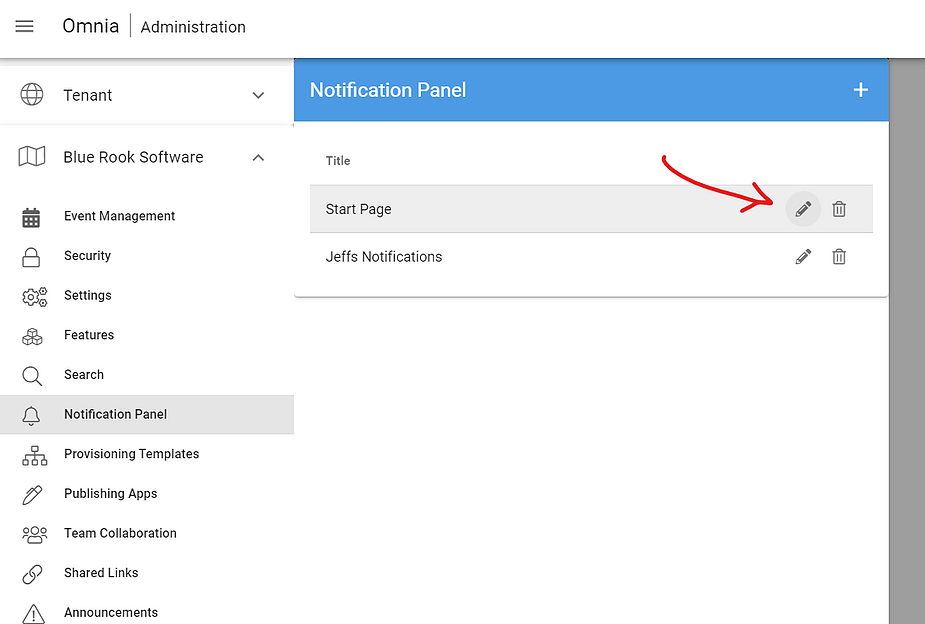
The Panel is managed in Omnia Admin, so we return there by pressing Shift+o+a or selecting “Omnia Admin” from the shortcuts bar (pictured):
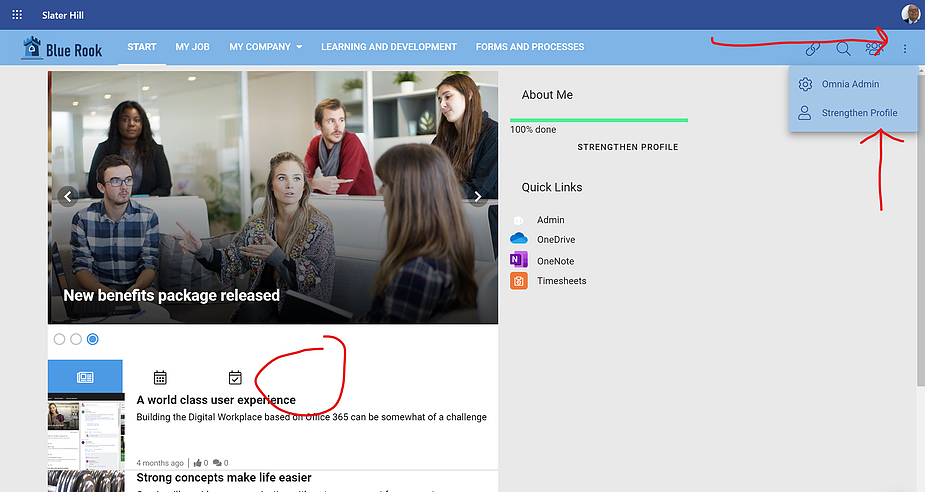
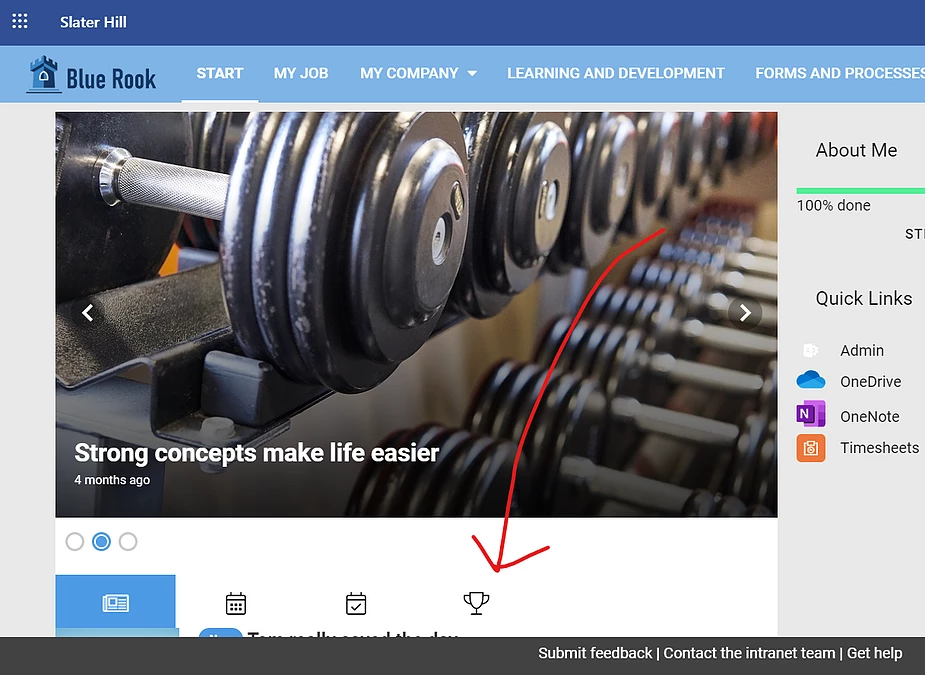
Note in the above screenshot of our homepage the main notification panel on the bottom left. It currently has three tabs, for News, Events and Tasks. We’ll add a new tab for Praise items, in the empty space circled in red.

I’ve been working in my Blue Rook Software business profile, so I select that in my Tenant > Business Profiles list. Now I can collapse Tenant, scroll down to the Blue Rook settings and select Notification Panel. I click the edit button next to my primary panel:
Under Category Settings for my panel app, I see the existing three tabs; underneath those, I will click Add Category and give my category a name (Praise):
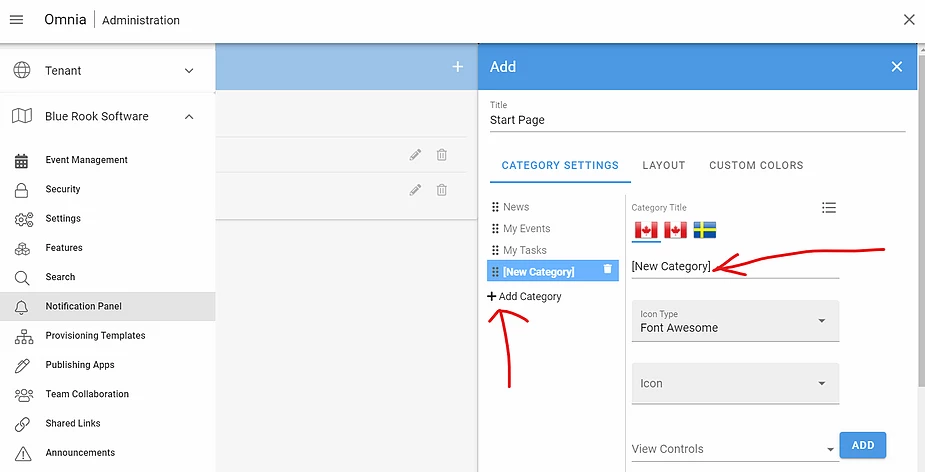
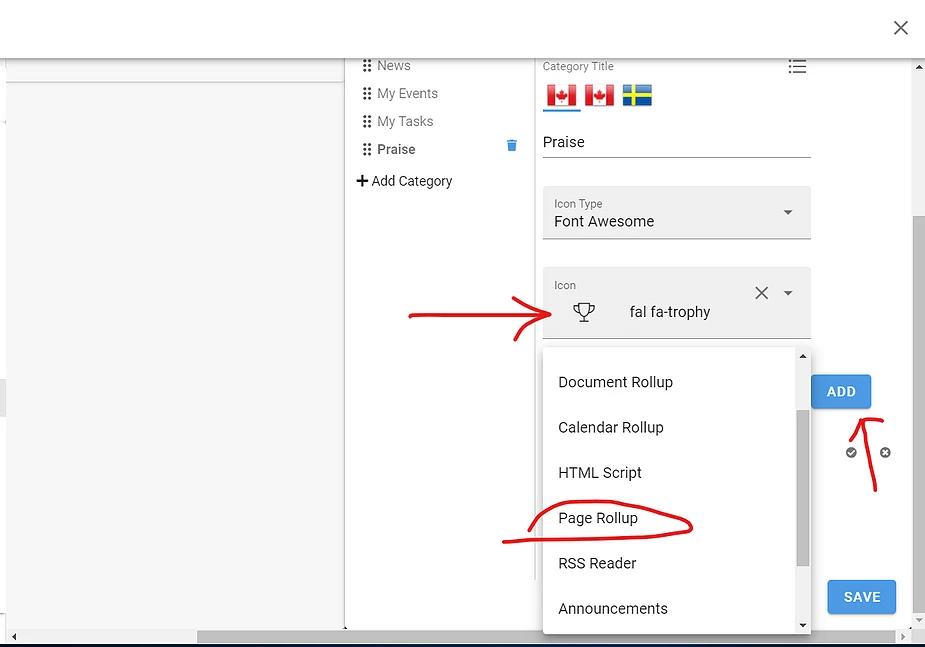
Each tab in a Notification Panel needs at least one Display Control, so I click the ADD button and select a Page Rollup control.
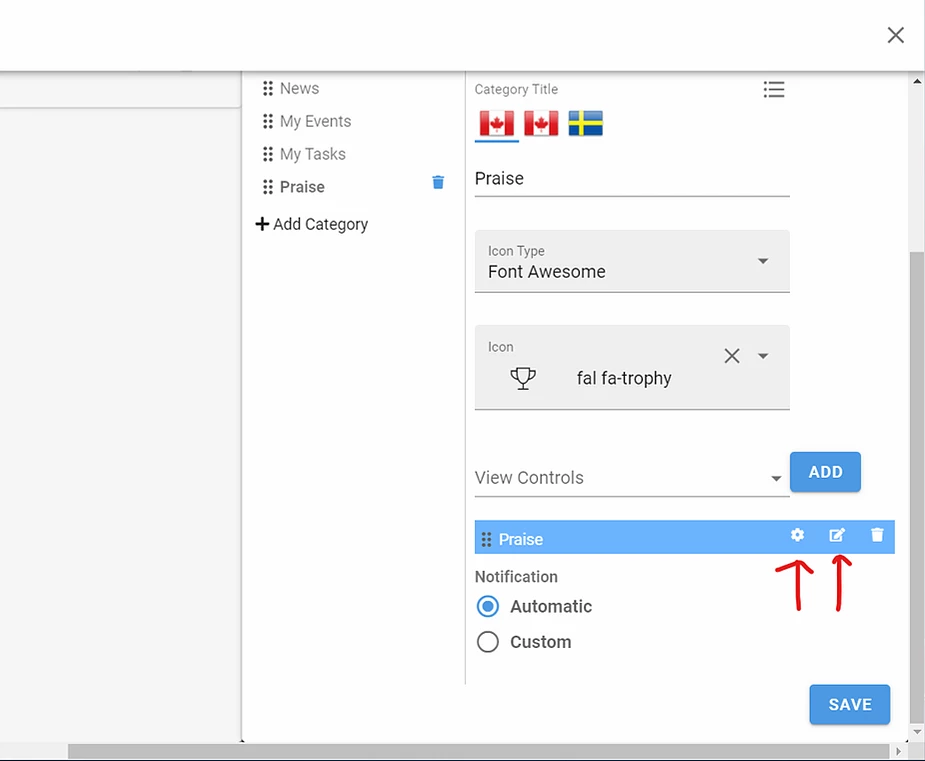
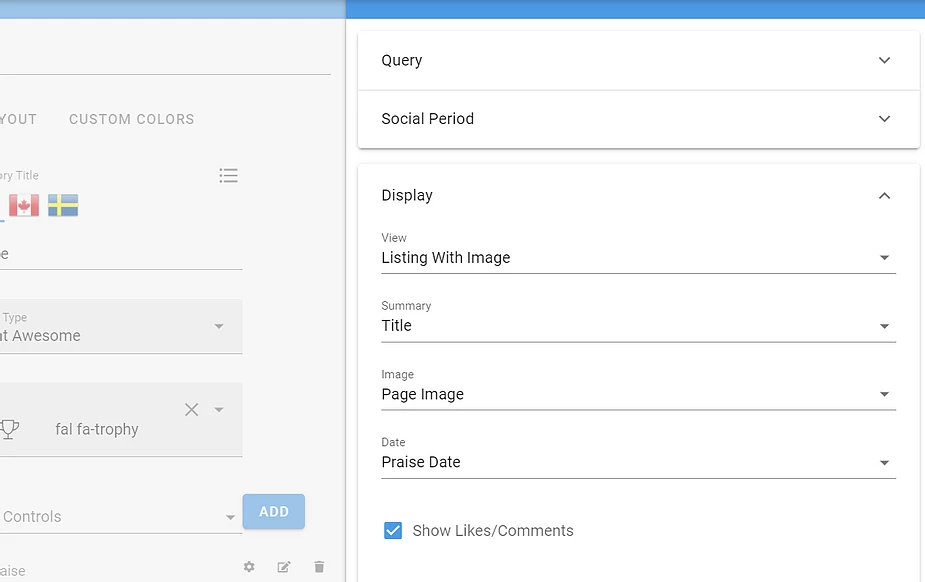
Now that I have a View Control in my tab, I’ll first use the pencil button to give it a name (I might as well use “Praise” again). Then I use the gear button to open the settings and tell this control which items to display.
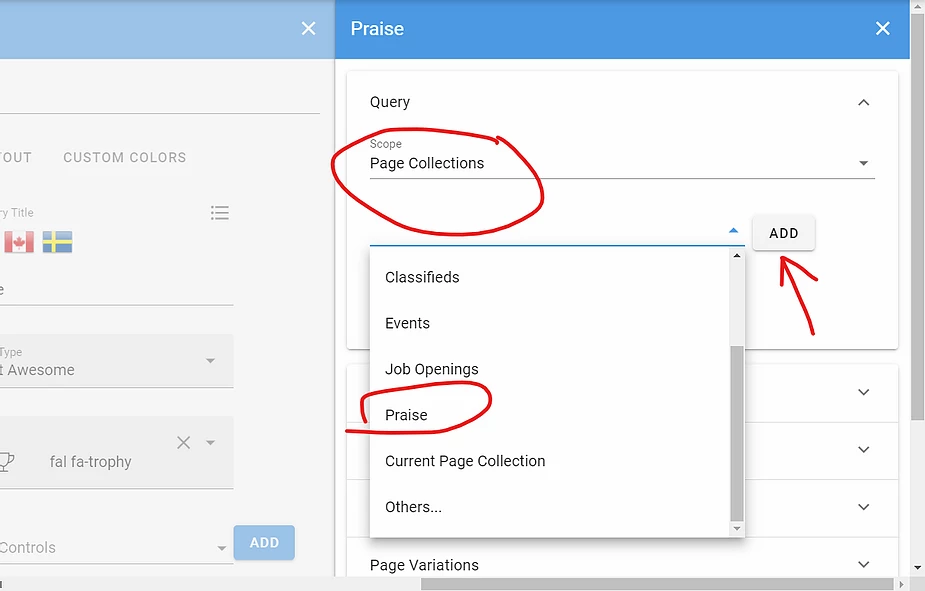
I first provide the Query, telling the rollup to look in the Page Collection called Praise. At this time I could also specify filter values (for example, show only kudos marked with the “Big Sale” type). Since this is for the homepage of the intranet, I won’t filter any items out.
Next I open the Display section and specify the View to use (I’ll choose “Listing With Image”). I map fields in the View (Summary, Image, Date) to the data properties in my Praise page type:
That’s it — we’re done! I carefully click Save on each screen in Omnia Admin (very important), then close it up and return to my site. There is now a Praise tab on my Notification Panel:
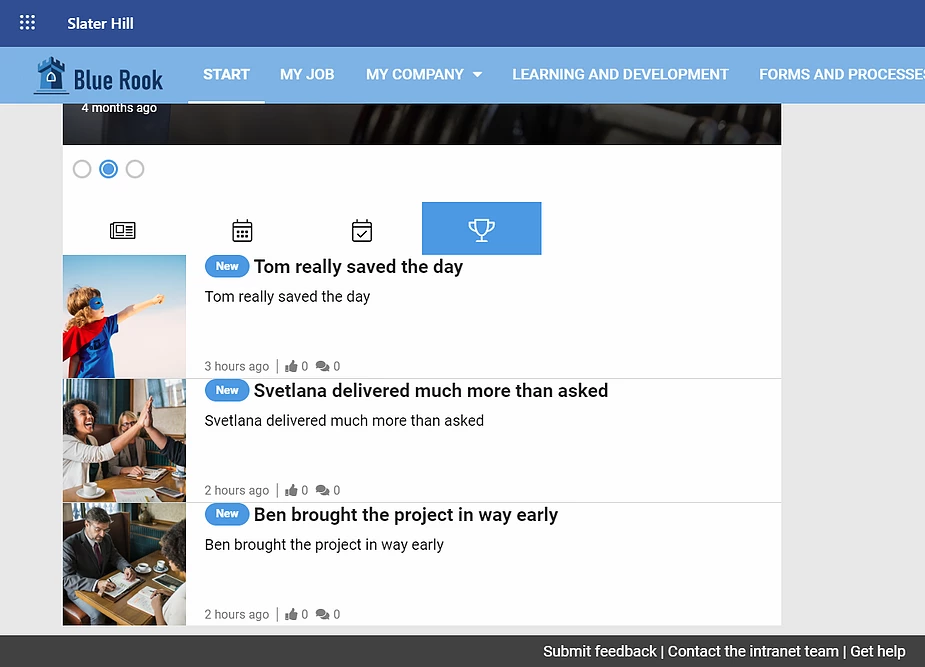
I can now see three sample items I added appearing as new kudos in the panel:
These items will also appear in users’ Omnia Feed mobile apps.
Omnia customers have used Page Types and Rollups to create New Hires, Classified Ads, and many other apps. Do you want to see a demo of Omnia Intranet in action? Contact us to set it up via Teams or Skype.